Showing posts with label Children's Clothing. Show all posts

Thursday, February 9, 2017

A Clean Slate

I bet I am not the only one who starts a project, is excited about the potential, cuts out the pattern, cuts out the fabric and then for some reason can't find the umph to complete it?  Yeah, you do it too?  Good now I know I'm not the only one! 

The three projects in this post were all UFO's (UnFinished Objects).  They've been lurking in my sewing closet taking up precious space in said closet as well as in the back of my mind.  So it really was time to either part ways with them or complete them!


There is nothing that gives me a good push like a sewing competition.  I guess the thought that there is a deadline and others are also working toward a similar goal inspires me to complete a project- and it can be so.hard.to.restart.a.project!  Pattern Review held a UFO contest this past month and that was enough to get my sewjo back.


UFO #1:

This dress is out-of-print Butterick 5947.  I used this pattern last winter to make this dress and then frankenpatterned the bodice from this pattern to the skirt of another resulting in this dress.  Its a solid little pattern for a sheath dress.  The princess seaming is so helpful with fitting.  

Fabric and construction where similar to the dress made last winter.  The black wool is from a FabricMart make and the herringbone tweed was a purchase from Hancock fabrics back when.  The lining is a mixture of bemberg and poly in the sleeves because when you cut something out a year ago and forget about it you also forget that you did not cut out all the lining pieces...argh! 

In the picture below I am showing the hong kong seams used to finish the armscye, this is done because I don't like the feeling of wool against my skin, so itchy.  I used an invisible zipper which I had a devil of a time installing for some reason.  I just couldn't get everything to line up so after three attempts I called it good. 


UFO #2:

My second UFO is a pair of Grainline Maritime shorts.  I made them some time back and you can see them here.  The reason this pair stalled is kind of petty, but it turned out I needed a bigger size this summer than my previous pair and that just deeply annoyed me. 

I can fit into the old pair, but just barely, sigh.  So I cut out the pattern again as well as the fabric (all last summer) and just lost steam, probably because I just went out and bought a few new pairs. 


The Grainline Maritime shorts are really cute and functional.  I love the styling on this pattern, the zip fly, the curved pockets, back pockets, curved waistband.  All great features.  For this pair I believe I lengthened them by an inch.  Its a really short, short otherwise.  

The fabric is from Hancock and the last of this fabric in my stash.  I previously made a Grainline mini skirt with this fabric.  Btw, that was very short too!


UFO #3:

Get ready for the cuteness! This outfit was originally intended for my youngest and is a size two, so I have had it for two years waiting to be made up.  I believe the fact that my children were 5 and 2 when I cut it out is probably why it never was completed.  But it is so.cute.

Its Burda style pattern 9645.  If you are unfamiliar with Burda patterns, they always have such cute designs but the instructions are always sub par.  I don't go to Burda for sewing instructions but for cuteness.  


Since this will no longer fit my daughter I will be sending it on to Hanni for her little bit to wear next fall.  This peasant top, squeeeee- I can't wait to see her in it (btw where is my size in this top)!  And the cargo pants will be fun and functional since they are corduroy.


So now I am free of most of my UFO's, I say most because I know there are two little girl dresses that I haven't finished and may not!  But it feels good to have the slate mostly wiped clean for the new year of sewing.  I am glad I pushed through with these projects since each one turned out so pretty.

How about you?  Any UFO's you'd like to move past or donate?  
Any that you will shove into the far reaches of your sewing space?

Thanks for reading and happy creating!
Elizabeth

Saturday, January 2, 2016

Sewing Velveteen (aka Belated Christmas/New Year's Dress)!

 Last year I took it upon myself to make two Christmas dresses for my girls that were a little outside of my sewing comfort zone.  I used taffeta last year to push past my sewing comfort zone and this year I used velveteen.  After all velveteen is lush, it is soft, it is classic, it sings sweetly of wassail and beautifully wrapped packages tied with satin ribbons and it also happens to be a real pill to sew.  If you've ever sewn with velveteen you know that it is a fabric that likes to shift ALL OVER THE PLACE.  For someone who likes accuracy in sewing it can test your patience!  I ended up using three tricks to get my velveteen to behave (at least as much as you can manage to make velveteen behave).

 Tip One: Use a walking foot, if you don't have a walking foot, in my opinion, don't bother.  The pile or nap on velveteen when you try to sew it to another fabric makes it shift like crazy, things won't line up properly if you don't have a walking foot to help the top layer of fabric walk through the sewing process at the same rate as the bottom layer of fabric.  Now there is probably some other way to manage velveteen without I walking foot but I wouldn't want to be caught in that torturous place.  Even with the walking foot, setting the sleeves in was a real challenge as well as lining the sleeves.  I must have pinned and ripped it all out three times before I gave in to the process of the sleeves not being perfect. 
Tip Two:  Hand baste your seams together, especially if you are easing fabrics together or have multiple layers like gathers and pleats.  For this dress I only had to hand baste the sleeves into the bodice but for my 3 year old's dress I had to also hand baste the pleats.  I have yet to take pictures of her dress on her but will probably tomorrow.  The hand basting kept everything together in addition to pins and the walking foot.  Like I said this fabric shifts and you want to minimize the shifting as much as possible.  Hand basting is a pain but it beats sewing and ripping out stitches multiple times.
 Tip Three:   Lower the pressure on your presser foot.  My machine has a dial that lessens the pressure of the presser foot and this can be helpful in managing the fabric, you might have to play with that a little because on some seams it seemed to help and on others it didn't.  But its worth a try.

Final Tips:
Insert an invisible zipper when using velveteen, I used a regular zipper at first and it looked terrible so that was ripped out and replaced.  Funny enough the Vogue pattern I used to sew my 3 year old's velveteen dress didn't call for an invisible zipper either and it was drafted with velvet in mind- go figure.  But believe me when I say a normal zipper will not look good.

Accept that it will not be perfect, I can get a little crazy about wanting accurate, even seam allowances and absolutely no puckers anywhere but I found it ok to have some spots that were less than perfect by meditating on something a seamstress once told me.  As I was contemplating fabric choices and the various as-sundry little details of a project for one of my daughters, in talking it over with a sewist at the fabric store she said to me "well I always gave people this advice when I worked at a sewing store that taught classes on smocking children's dresses- can you tell the difference on a galloping horse?"  She went on to explain that putting a garment on a child is like putting something on a galloping horse and you probably aren't going to be able to tell the difference in whatever discrepancy your worrying about when its riding past you on a galloping horse.  That piece of advice helped me just move on when a seam puckered a bit or a seam allowance didn't look perfectly even.  Good advice.  Sage sewing advice.  Advice for a Momma to live by!

A few parting details about this dress, my daughter is 7 years old and tall, so I sewed a size 7 dress with size 8 length added.  Its Simplicity 1174.  The pattern is great and I highly recommend it.  I fully lined the dress but lining pieces aren't included in the pattern.  The bottom portion of the dress is satin from Hancocks fabrics.  The velveteen was from a local quilt shop.  This dress would be a breeze to sew in a nice well behaved cotton.  If you've read this far, thank you for indulging me in my velveteen rant!  Its a beautiful fabric, no doubt, and it will definitely push you out of your sewing comfort zone!

Tuesday, June 30, 2015

City Gym Shorts for Kids

Pattern:
This is the City Gym Short pattern for my 3 year old made in Sesame Street and yellow calico quilting cotton.  I love this little pattern it fits my 3 year old perfectly.  She is a tall slim toddler and there is room for a pull up diaper when she needs it but they also fit great with undies.  The has a separate waistband piece which is different from the Made with Moxie shorts I reviewed earlier.  I like the separate waistband better it just feels cleaner and smoother than simply folding the shorts over at the top.  The other difference between the two patterns is that this one does not have pockets and uses woven fabric for the bias finish.  The only construction issue I ran into was that the bias tape maker was to be 18mm and I didn't have one this size so I had to press the tape the best I could.  
 Will she wear them?
Yes, she wears them as compliantly as any three year old wears any clothing item.  I personally think they are the cutest shorts in her dresser.  I made her a dress out of this fabric over a year ago and really wanted to use it up before she decides she no longer likes Sesame Street.  I love Sesame Street and think its is adorable so Momma got her way on this one!


Saturday, June 27, 2015

Prefontaine short for kids

 Pattern: Prefontaine Shorts for kids in size 5/6 years.  This is a pdf pattern and this is the second pair I've made for my 6 year old daughter.  The first pair is the floral black pair below made at the end of last summer.  Amazingly they still fit this year so I made a second pair (green) for her this summer. The pattern is pretty good, the only small critique is that there is no separate waistband piece which means that you have to fold over the top including the contrast knit bias tape finishing which can be pretty thick to fold over.  I made no changes to the pattern and the sizing is pretty forgiving considering the 5/6 fit her last summer and this summer.  I like that you use an old t shirt to make the finishing contrast tape. 

Fabric: The fabric for both pair are quilting cottons.  I am still stashbusting quilting cottons and haven't bought any new quilting cottons in what feels like ages.  I think its secretly multiplying underneath my fashion fabrics.
The pink bias tape finishing is actually an old knit shirt cut into strips as per the pattern instructions.  Its a new finish for me but it works great in using up an old t shirt.   One t shirt can yield a lot of tape. 
Will she wear it? She has worn the black pair quite a lot this summer and some last summer (takes her a while to warm up to new clothing items).  Her green pair hasn't been quite as popular but I think with some time she'll love them too.  That about sums up these shorts.  I have also recently completed the Purl Soho City Gym shorts for my 3 year old and will write that up soon since its very similar to this pattern.  The Purl Soho Pattern is a free download and I really recommend it!   

Saturday, May 16, 2015

A Graduation Ayashe Set

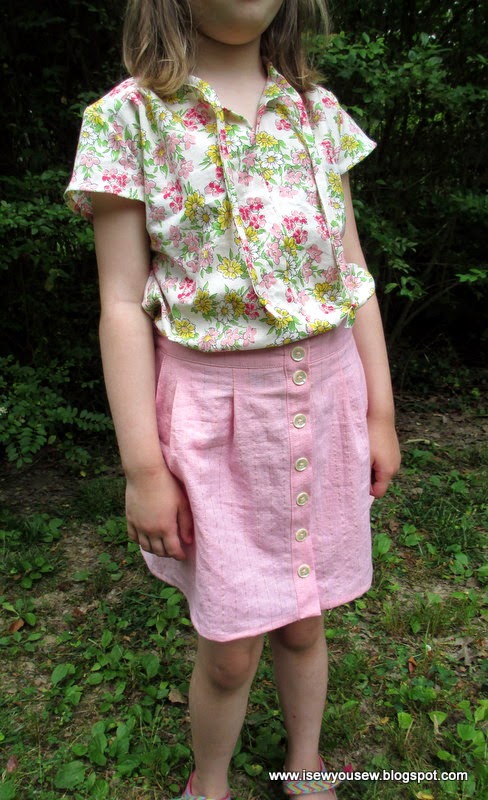
 This big girl is graduating Kindergarten next week!  I wanted to make her a fancy dress for her graduation or "congraduation" as she calls it, but she did not want a fancy dress.  Instead we settled on this Figgy's Ayashe Set.  I made her the longer sleeve version of this top (in the very same fabric) this past winter and she loved it, wore it every week.  So when we were working out (negotiating) what I would make her for "congraduation" she saw this fabric and wanted a summer version of the top.  I was good with that, plus I knew I had this pink cotton/linen blend that would work well for a skirt.  So I called it fancy enough and know that she will get a lot of wear out of this outfit this summer.
 Pattern: This pattern, oh this pattern, I love the resulting garments, but the first time I made the top I found some of the instructions a bit confusing.  This was the third time I've made the shirt and I really only glanced at the instructions.  I will say though that I have come to expect a little more hand holding type instructions from Indie pattern designers and this was wasn't quite up to that standard.  In a few places I'm pretty sure I found some errors but am too lazy to really go back and study the instructions.  I do know for sure that the outside packaging calls for 1 inch elastic for the skirt and the instructions within say 3/4 inch.  Just a heads up to anyone out there, the garments are adorable- in particular we LOVE the top but the instructions might be a bit confusing or sparse for a new sewist.

The top comes together pretty quickly and easily and I do need to note that the instructions have you set the sleeves in after the side seam is sewn up and really this isn't necessary, you can set them before you sew the side seam.  If you wanted to, this top would be a great showcase for an alternate fabric on the yoke or ties.  Lots of cute potential and its a woven, which I love.   The tie on this one is one of two options for the neckline, this winter I used the mandarin collar finish and I think I like this tie better. 

The skirt is kind of a fussy little make.  You are supposed to make buttonholes for your buttons but since the back waistband is elastic I found working buttonholes unnecessary and just sewed the buttons on.  BTW the elastic back waistband is a fantastic idea and Figgy's has you extend your elastic a bit so that as your child grows you just let the elastic out.  I left off the optional belt loops, she never wears belts.  I added about 1 1/4 inches to this skirt and only turned it up 1/2 inch total to hem it so if your child is on the tall side you may want to add length too.    


The necktie makes a cute bow!
 Fabric: The top is quilting cotton from my stash and the skirt is cotton/linen blend I've had for ages. 
He's been her constant playmate for her entire life!
 Will she wear it? She loves it, wanted to keep it on to play in, however we are going to try to keep it clean until "congraduation" and then she can wear it until her hearts content.  Its always so much fun when they love wearing what you make them.  I find that these days its probably better to get some input from her before I make anything for her. 

On another note, the pictures of this girly with her dog just make my Momma heart smile.  She loves our dog and he loves her too.  Such sweet pals.   
These two have a special bond.  We sure do love our dog Buster.

Monday, May 11, 2015

M6991-Undecided and M6729-Swimsuit Success

We are having a hot pink week around these parts.  I don't know what that's about, mostly me just trying to stash bust and match appropriate fabrics with appropriate patterns- an exercise in concentration for me.  I've had both of these fabrics in the stash for more than over a year.   

Pattern:  The M6991 Wrap Front top.  I read the reviews of this pattern on Pattern Review paying careful attention to learn from others who've made it before me.  I went down to a size 8 as per others suggestion.  It does indeed run big, because I think even in a size 8 the shoulders are pretty big on me and the sleeves were very big as well.  I ended up cutting the sleeves off as seen in the pictures because the volume of the long version was pretty silly looking on me.  If you make this pattern be sure to mark your fabric carefully and note that the front is twisted back on itself- so you definitely need a fabric that is the same on both sides.  I can't say that I am sold on the shape of this top, it looked funny when paired with my black pencil skirt.  I just don't know about adding volume around my tummy and hips, I usually try to avoid things like that.  

One thing that I didn't notice in the other reviews about this top was that the center front is pretty high up, meaning there is real potential for flashing your tummy whenever you raise your arms.  That's what I'm trying to demonstrate in the picture below- dangerously close to coming up above my jeans.  I am not a fan of that so I will have to wear a tank underneath this top.  
Fabric: This fabric is a very thin rayon challis from Fabric Mart.  I bought it ages ago and it is a J Crew fabric.  I originally bought it thinking I'd make a skirt from it but when it came it was so sheer that I didn't know what to do with it.  So this top was perfect because of all the folds in the front of the top you can't see through the front.  I am really wondering what this shirt will look like after I hand wash it, will it go back to a pretty shape?  To avoid washing it a lot I might put it away until fall when I can comfortably wear a t-shirt underneath it.

 Styling: As you can see I really didn't style this top, just put it on for pictures.  I'm guessing it might be good for work with black dress pants, as I stated above, it looked pretty weird with my black pencil skirt.  I may have to wear it a few times and play with the styling before I figure out what it pairs best with.

Now to the thing that I am most proud of today....I MADE A SWIMSUIT!
 Pattern: This is McCall 6729.  I have seen this pattern and doubted my abilities in the past but this was the year I was determined to make my girls swimsuits.  I thought this pattern would be a good starting point and it was.  I knew it would be too short for my tall 6 year old gal so I slashed the pattern at the waistline mark and added a little over 1 1/2 inches to the suit, then after holding the pattern up to my daughter's torso I added a little over 1/2 inch to the very top neckline.  If you use this method, note that the crotch wraps around from the front to back.  It turned out to be the perfect length.  You'll have to take my word for it.  To get the estimate I needed for length I also measured a swimsuit my daughter tried on at a store.  It always pays off to keep a tape measure in my purse!   

Plus I added a bit more coverage to the bum, but it wasn't necessary.  I added about a 1/4 inch to the back leg curve and then used 1/4 inch elastic instead of the 3/8 recommended.  Next time I will cut it out as the pattern indicates and then just use 1/4 inch elastic to finish the leg openings.  

I fully lined the suit in polyester swimsuit lining. I didn't want there to be any exposed crotch seams so I layered the pieces this way, Front of suit right side up, back of suit wrong side up, back of suit lining right side up and then front of suit lining wrong side up. I pinned them all together at the crotch, stitched and then flip the front lining up and over the trimmed seam. Worked great. 

Fabric: I have had this floral swimsuit fabric for over a year and bought it at 90% off the original price at Hancocks.  Its perfect for my daughter who loves bright colors and pink in particular.  The lining is just plain white swimsuit lining and I lined the front and back of the suit.  The elastic is 5/8 inch fold over elastic from Hobby Lobby.

Will she wear it? Yes!  She likes it and its perfect for swimming lessons.  Has more than enough bum coverage and chest coverage!! Yippee!

So there you go, making swimsuits is very doable!  Don't think I will go back now!


Linking up to Sew it Chic in a Week.

Sunday, October 5, 2014

Still stash bustin' with Simplicity 2064

I am still stash busting over here and my latest stash busting bff is Simplicity 2064.  It was a Little Lisette pattern that is sadly discontinued.  Why oh why do the big four pattern companies phase patterns out so quickly?  I mean I've only had this one sitting in my pattern stash for about 3 years (that's a spring chicken pattern to me) before I made it!  So I really wish they would bring back some of the Lisette patterns and especially the Built by Wendy patterns....please,please bring those back!  
 My hope with this pattern was to gobble up a few pieces of fabric that weren't quite big enough for dresses or tops.  The first skirt is made from a Heather Ross design for Hancock Fabrics.  Its from her Crafty Chloe series.  I've said it here before, I think this book series and pattern series is adorable and so does my 5 year old who is kind of hard to impress with fabric.
 This pink skirt is made up in size 5 and is just perfect the denim one below is a size 6 and a bit to big and long for her just yet.  These will be perfect to wear over leggings in cool weather.
 This girl's so full of antics these days...they include laughing loudly, phpptttt noises, making up jokes that she believes are hi-larious, pouncing on you and rarely smiling for pictures instead she sticks that tongue out as far as possible!  I'm so glad she is who she is- my equal parts silly and tenderhearted sweetie!

Monday, September 22, 2014

"Eggplant Purple Retro Reproduction Dress" or "How I Stash Bust"

Once again I've made a Retro Reproduction dress!  Surprise! Surprise!  This is another circle pocket version made up in corduroy.  The length of corduroy was left over from a project last year and I didn't have enough length to cut out the front and back of the dress so I slashed the front across the breast and added piping.  This is a great way to eek out another dress from a small or odd shaped piece of fabric.  

The piping and bias tape are me-made and are the reverse side of black and white striped fabric.  I started to use the right side but didn't like how sharp the contrast was, when I turned the fabric over I realized the stripes appeared to be gray which I loved.  This is one of the sewing tricks I like to use when I'm not 100% satisfied with a fabric in my stash, I just turn it over and see if I like the reverse side or "wrong" side better.
 I'm thinking that the next iteration of this dress might just have to have some gather or pleats on the center front under that slash line...  The bottom is bias tape finished and that adds a little extra length that this growing tidbit needs.

 You may notice those awful bug bites on little girl's arms and legs - those are from the massive amount of mosquitoes in our back yard.  We have battled and battled those darn critters but they are the meanest mosquitoes I've encountered.  They care nothing about any kind of "gentle" kid friendly repellent.  Hopefully they will subside soon when the weather cools.  
I just had to include this picture of little bit bending down, it really puts me in the mind of Eloise Wilkin drawings.  Her illustrations are always my favorite.  Well, here's to one more Retro Reproduction dress to transition into fall, I'll say it again, its such a quick make that its really sew little trouble to add pockets and bias tape.

Wednesday, August 27, 2014

Fall Retro Reproduction Dress and Aster Cardigan


The Retro Reproduction Dress FREE Pattern is available here.

By now, if you follow this blog, you know that we have a great free dress pattern we call the Retro Reproduction Dress.  This outfit for my two-year-old is another iteration of this pattern with added half circle pockets and the Aster cardigan from Willow & Co. patterns.  Fall is just around the corner and the sun is starting to cast those nostalgic shadows while the leaves are just giving hints at the colors to come.  So I felt the urge to make something that will transition in Little Bit's wardrobe into the next season.  

The Retro Reproduction is made up in some medium weight denim from my stash.  The hemline is finished with bias tape for a bit of extra length (this girl is getting tall).  The pockets are half circles finished with me-made gingham bias tape.  Since this dress is only made of four pattern pieces making additions like these pockets feels like no burden- in fact I usually still have time and energy to add a little something extra to this dress since it is so simple.  I envision Little Bit wearing it with golden yellow leggings this fall when there is a chill in the air!
Now on to the cardigan.  This cardigan was in fact made from the most homely turtleneck one could ever behold.  It was a bit worn and sad but I just love that cranberry color for fall so it was destined to be reborn into this cardigan.  If ever I hope to save a knit garment I sometimes use the "wrong" side of the fabric as my new "right" side so that any pilling or fading is inside the new garment.  The bias tape used as flat piping here is some gingham cotton and I simply basted it to the collar before stitching the collar together.  The buttons are sewn on and instead of using buttonholes I used snaps.  The pattern has instructions for buttons and buttonholes but my fabric was too bulky to fit under my buttonhole foot.  


This worked fine for me and probably is better anyway since buttonholes on knits can sometimes look wonky and stretch out over time.  The pattern was good to work with and knits always sew up so fast.  This is a size two for my two-year-old so the sizing seems right.  I think I may lengthen the sleeves this winter so that she can wear them when its colder but this length is perfect for putting on top of all those sleeveless summer clothes that she still fits into right now.  


I really love fall colors and love the way that both of these pieces came together.  I have been trying desperately to pare down my stash fabrics and making clothes for my two-year-old is perfect for pieces that are too small for adult clothing like this denim.  
This is just the beginning of my fall sewing (my favorite time of the year) and fall colors are my very favorite colors to coordinate.  I have lots of plans for some of my fall looking quilting cottons, I definitely think a few more iterations of the Retro Reproduction dress are on the docket.  If any of you are interested in a tutorial for these pockets let me know and I may add that to the bill this fall, until then, happy sewing!
Linking up to Frontier Dreams Keep Calm and Craft On.

Saturday, August 2, 2014

Bitty Girl's Summer Kitty Top

This is the Oliver and S Badminton Top.  I originally intended this to be a birthday dress for my Bitty Girl but I only had the smallest portion of this kitty fabric left in my stash and since Bitty Girl really loves cats it had to be made into this top. 


I made the 18-24 Month size and she is 2 years old.  It fits her wonderfully and I love how clean everything looks with this pattern- meaning everything came together really smoothly.  The instructions were wonderful and completely thorough.  The one change I made to the pattern was to finish the hem with bias tape instead of folding it up a couple of times.  It seems both of my girls need that extra length- they're slightly on the tall side.    


If you've been thinking about an Oliver and S pattern I would highly recommend them.  I purchased this one from a locally owned quilting fabric store called The Stitchery.  As a person who sews garments I try to support this shop as much as I can- I'm sure its really hard work to keep a quilting shop going and I love the assortment of adorable prints they have at ours.  All of that said I really wish the quilting fabric industry would put out more apparel friendly fabrics.  It probably isn't as profitable for them to do so but some of those quilting cotton prints are so cute and I'd love to see them in some other fabrics.   

I've set myself a loose goal this year of trying to aggressively use up a lot of the quilting cottons I've accumulated.  I bought almost exclusively quilting cottons when I first started sewing and they are languishing in my stash and cluttering my mind- so this may just be the year of using them up!  So you will probably see quite a few posts about that here in the next 6 months or so!  How about you, are you overwrought with quilting cottons?  Are you seeking projects to gobble them up like I am?